Row Level Security can be configured in Power BI through roles. These roles can be set in Power BI Desktop (for import or direct query reports), or with a Live connection in Analysis services. Please make sure when you want to user the username of the person that is logged in to Webdashboard, in Power BI desktop you use username() and in Analysis Services you use CUSTOMDATA()


Now publish to report to Webdashboard and open the Row Level security popup through the settings, go to the Roles tab and select Add role.
Name the role exactly the same, this is case sensitive and select the report you want the role to apply to.
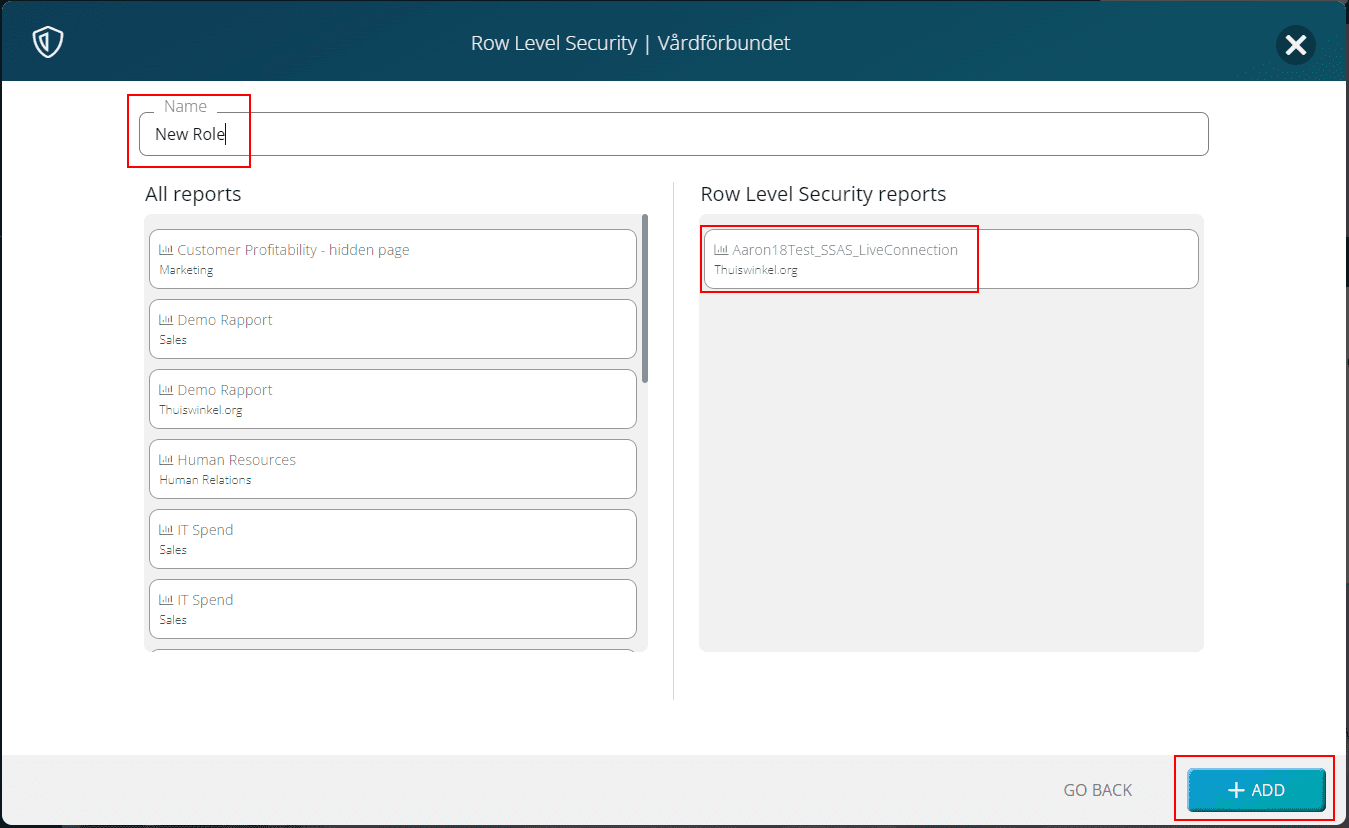
Figure 3: RLS – Add Role
Now you configured RLS in Webdashboard.
Here are a few things to keep in mind when using Row Level Security in Webdashboard:
Webdashboard can have the exact same report in multiple Workspaces. So when you connect a role to a report in one Workspace, it doesn’t apply to the same report if it’s in another workspace.
Row Level Security is applies for all users that has access to the workspace. There is no way to add row level security to a specific user or group with a Workspace.
For Example:
You have two RLS role Manager and Employee. You have one report where the CEO must see everything, the Manager can see everything from his employees and the employee can only see his data. You solve this by creating 3 workspaces and add the same report to those workspaces (through the Add Existing Report option). You configure the Employee role on workspace 1, the Manager role on workspace 2 and no RLS on Workspace 3.
For course this can also be resolved in the data, when you add the function and the in your datasource. But the above is just an example how it could work.